- July 4, 2025
- 9:14 am
Make a herringbone design side table using pallet wood and hairpin legs
Crafting a Pallet Wood Side Table with a Herringbone Design
12 hours in Total: 1 Day!
Course Scheduling Options:
The courses listed below are available in flexible time slots:
- Evenings (Monday–Friday): Three-hour sessions
- Daytime (Monday–Friday): Choose between three-hour or six-hour sessions
- Saturdays: Limited to five-hour sessions per day
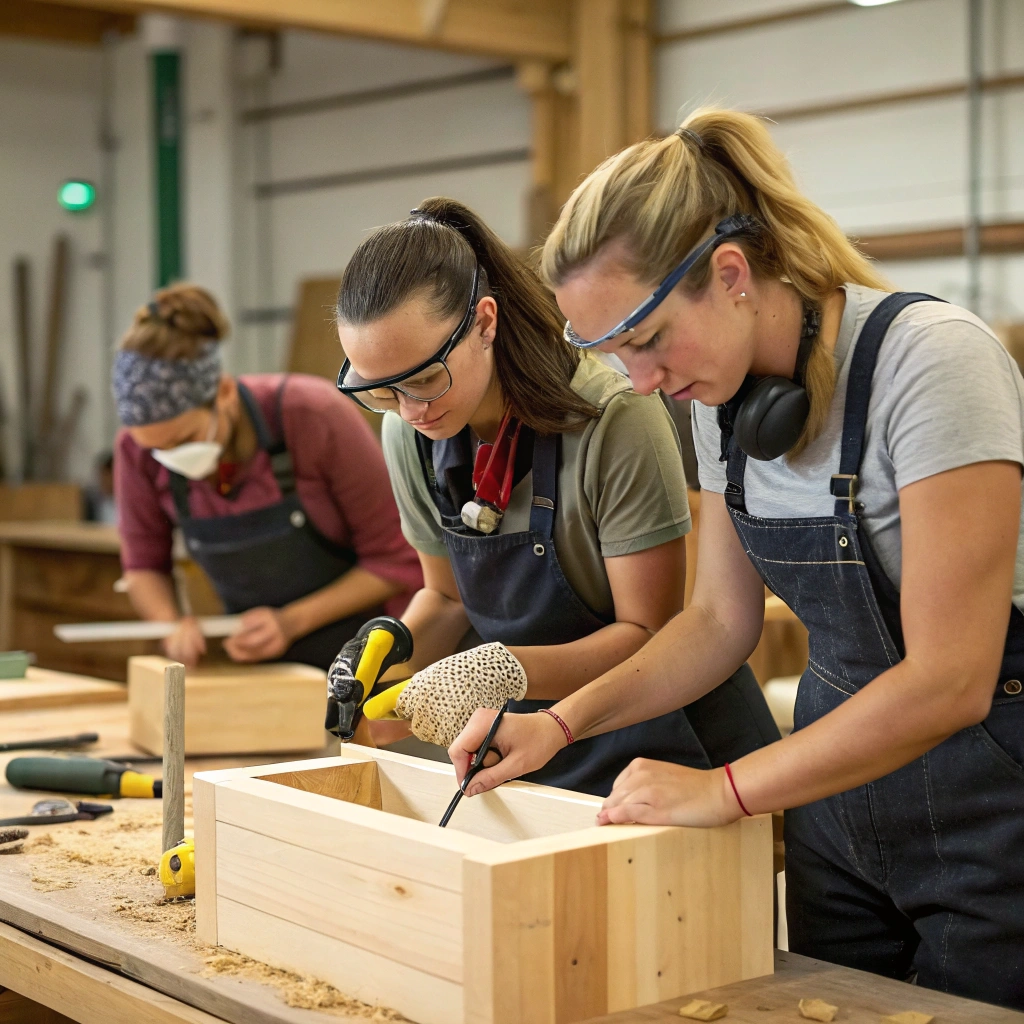
This professional workshop is carefully structured to impart essential carpentry skills to participants, empowering them with the fundamental knowledge necessary to undertake a variety of woodworking projects with confidence. Attendees will become proficient in the operation of a combi drill and hand saw, which are among the most vital tools in any woodworker’s toolkit. The session integrates foundational tool training with the engaging creation of a sophisticated side table featuring a distinctive herringbone-patterned top and modern hairpin legs, contributing a contemporary touch to any setting. This workshop is ideally suited for individuals who aspire to enhance their woodworking capabilities while concurrently crafting a functional and aesthetically pleasing piece of furniture that can be treasured for years to come. Participants will depart from the workshop with not only an exquisite side table but also newly acquired skills and the motivation to further pursue their woodworking endeavors.
Session 1: Tool Mastery and Material Preparation (2 Hours)
Welcome and Safety Briefing
All images are produced using artificial intelligence and may not precisely reflect the workshop or the products developed!!

- Introduction to workshop safety protocols and the critical role of personal protective equipment (PPE).
- Overview of the workshop objectives and the design plan for the side table.
- Tool Training: Combi Drill and Hand Saw
- Acquire skills for the safe and effective operation of a combi drill for creating pilot holes, screw insertion, and executing precision tasks.
- Develop mastery of hand saw techniques, including executing straight cuts and controlled angles for achieving clean, accurate results.
- Engage in practice sessions using spare materials to enhance proficiency and confidence with the tools.
- Material Selection and Preparation
- Select and prepare pallet wood for the tabletop, prioritizing quality and uniformity.
- Sand the wood to eliminate splinters and ensure smooth surfaces for assembly.
- Verify that all selected materials are devoid of defects and appropriate for the intended application to ensure long-lasting durability.
Session 2: Constructing the Herringbone Tabletop (3 Hours)
- Comprehending the Herringbone Pattern
- Acquire knowledge of the principles underlying the herringbone layout, focusing on the measurement and marking of angles.
- Engage in the practice of dry-laying wood pieces to effectively visualize the design and ensure precise alignment.
- Cutting and Assembling the Pattern
- Utilize hand saws to accurately cut wood pieces at precise 45-degree angles to create the herringbone pattern.
- Initiate the assembly of the tabletop by adhering the first row of wood to a plywood base for enhanced stability.
- Proceed to add subsequent rows, carefully aligning pieces to sustain the integrity of the herringbone design.
- Trimming and Sanding the Edges
- Trim any excess wood around the edges of the tabletop employing a hand saw or circular saw.
- Smooth the assembled tabletop to guarantee a seamless, level surface and remove any rough edges that may have emerged during the cutting process.
Session 3: Framing the Top and Attaching the Legs
- Constructing a Frame
- Initiate the process by meticulously measuring and cutting pallet wood strips to form a robust border for the tabletop. This not only enhances visual appeal but also significantly contributes to the durability of the tableAfter cutting the pieces to the required dimensions, securely assemble the frame using a combi drill and screws. Ensure that all edges align perfectly and that the frame is solidly built, as this will guarantee the table’s longevity and stability.
- Attaching Hairpin Legs
- Subsequently, it is imperative to accurately mark the positions for the hairpin legs on the underside of the table. Allocate sufficient time to confirm that the placement is precise, as this will influence the overall equilibrium of the table.
- Employing the combi drill, fasten the legs securely. It is essential to rigorously check that they are evenly spaced and level to provide a stable foundation for the table. This step is vital for attaining a polished appearance and ensuring the functionality of the furniture
Session 4: Finishing Touches (2 Hours)
- Sanding and Staining
- Commence the process by meticulously sanding all surfaces and edges to achieve a refined and polished finish that not only elevates the visual appeal but also prepares the wood for subsequent treatments. Utilizing a progression of sandpaper grits, beginning with a coarser grade and subsequently transitioning to finer grades, is imperative for achieving an impeccable outcome.
- Following the completion of the sanding phase, proceed to apply stain, varnish, or paint as per your preference. These finishes not only amplify the inherent beauty of the wood grain but also deliver vital protection against wear and tear, ensuring that your table retains its stunning appearance for years to come. It is advisable to select colors and finishes that harmonize with your home decor for a unified aesthetic.
- Optional Decorative Features
- To render your table uniquely yours, contemplate the incorporation of creative finishes, such as dual-tone stains or striking painted accents. These decorative features enable you to customize the table to reflect your personal style and creativity, transforming it into a distinctive element within your home.
- Final Inspection and Showcase
- Conduct a thorough inspection of the completed table for stability, alignment, and overall aesthetic quality, making any requisite adjustments to ensure both visual appeal and structural integrity. This final assessment is essential to confirm that your efforts culminate in a beautiful and functional addition to your space.
- Finally, commemorate your creation by organizing a group showcase of all participants’ work. This event not only serves as a platform to exhibit your achievements but also offers a valuable opportunity to exchange ideas and techniques with fellow artisans, nurturing a sense of community and collective passion for craftsmanship.

List of DIY Classes


In Partnerhsip with

Working with

© 2025 Buildingitbetterni.com All Rights Reserved. Site by jolle.roger@btinternet.com
Building It Better NI Ltd NI725838 – Incorporated on 28 January 202548 Dunmore Road,Ballynahinch, Northern Ireland, BT24 8PR